Fun and Easy Summer Popsicle Crayons
Embrace the soon-to-be summer vibes by transforming your old crayons into colorful popsicle crayons! These chunky, homemade crayons are not only perfect for little hands to grasp but also make fantastic party favors! Let’s dive into this fun and creative summer craft and learn how to make these delightful popsicle crayons step-by-step.
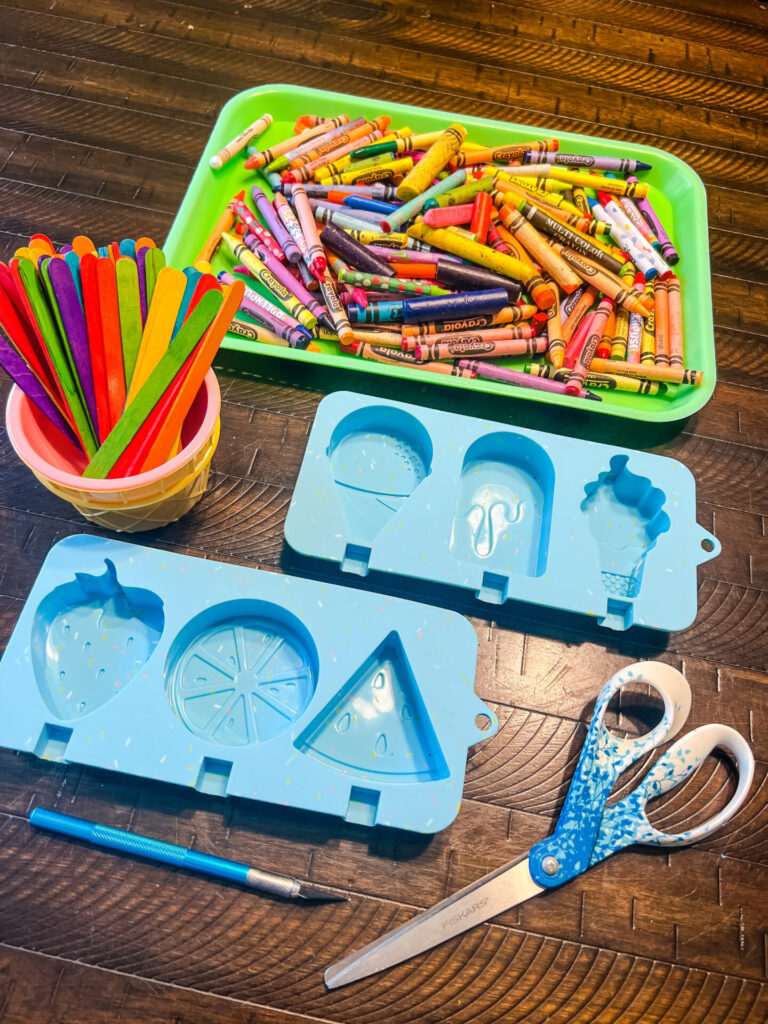
Materials:
- Old crayons
- Silicon mold
- Scissors
- Cookie sheet
- X-ACTO knife (optional)
- Popsicle sticks (optional)
- Aluminum foil (optional)
Steps-by-Step Guide:
- Preheat the oven to 275°F (135°C).
- Gather your collection of old crayons.
- Use an X-ACTO knife to make a single cut down the length of each crayon’s paper wrapper. This step allows you to remove the wrapper easily.
- Remove the crayon wrapper by using the cut line.
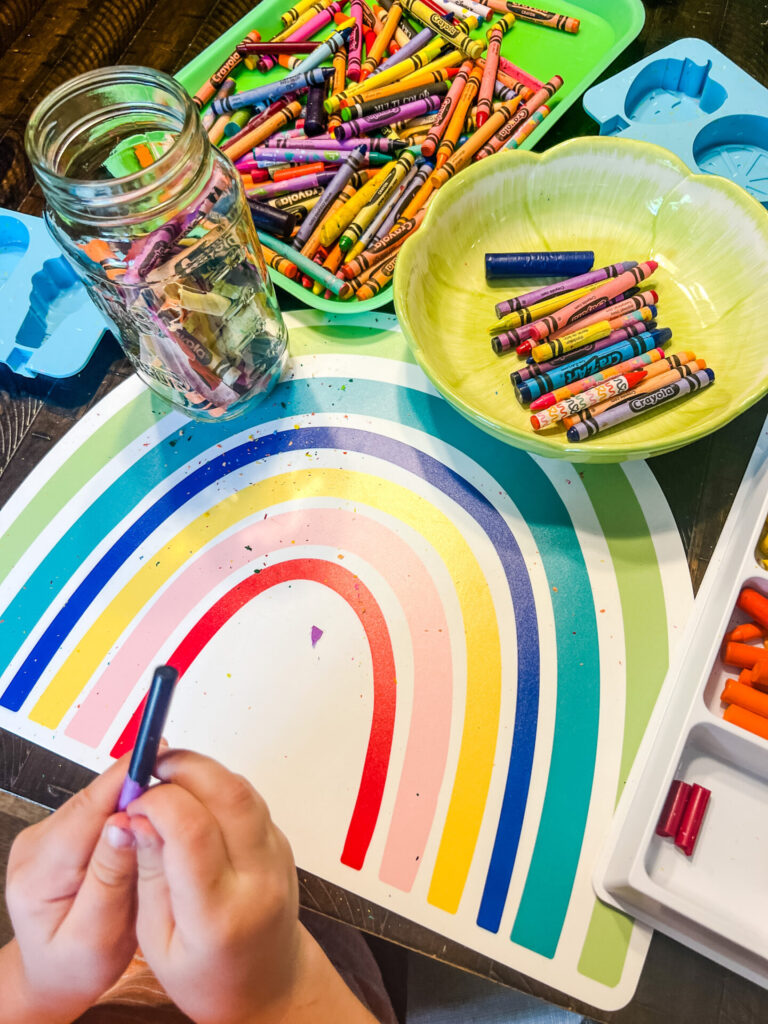
- Break the crayons into small pieces and sort them by color.
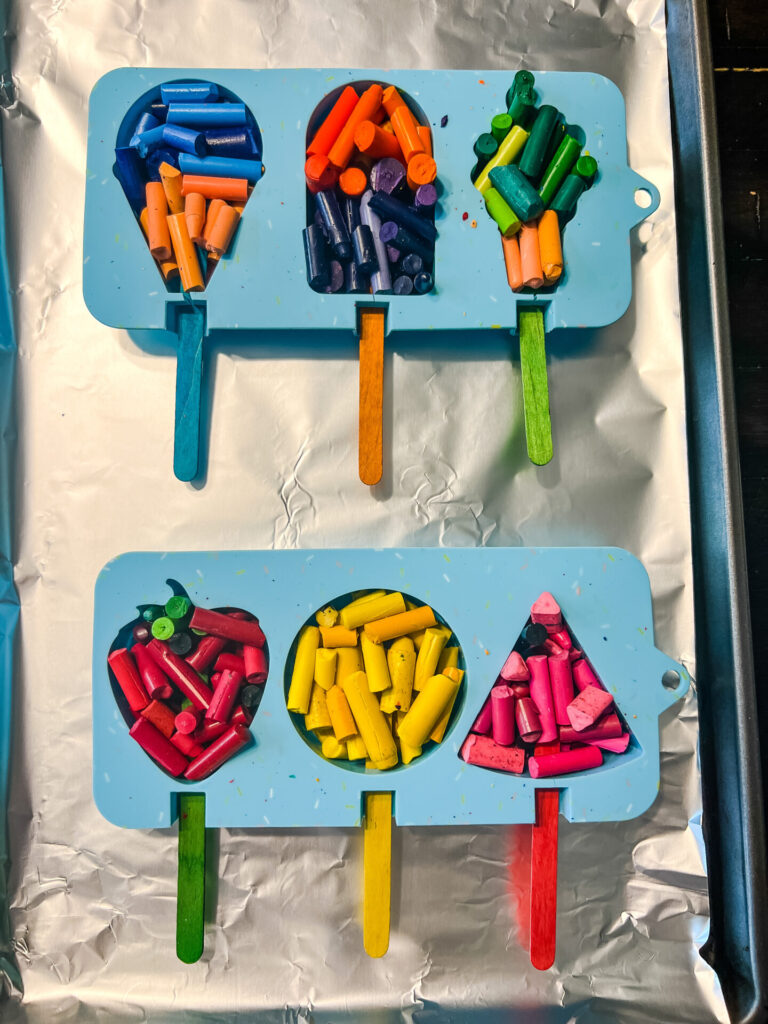
- Choose your favorite silicon mold. If you’re using popsicle molds, insert popsicle sticks.
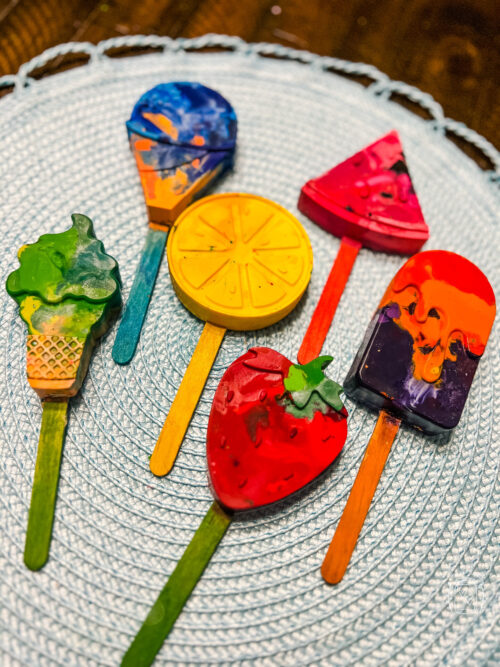
- Arrange the crayon pieces in the molds, mixing and matching colors of choice. Get creative and make each popsicle unique!
- Lay a sheet of aluminum foil on the baking sheet for easy cleanup in case the crayon wax spills over the top of the molds.
- Place the molds on top of the baking sheet and pop them in the preheated oven.
- Allow the crayons to melt for about 7-8 minutes for smaller molds and 10-12 minutes for larger molds, or until they turn to liquid. Keep a close eye on the oven.
- Carefully remove the tray from the oven and let it cool completely.
- Once the crayons have hardened, gently push them out of the molds.
- Unleash your inner artist! Grab your new popsicle crayons and let your imagination run wild on paper.
Crafter’s Tips:
- Use a bowl or jar to collect the paper crayon wrappers for easier cleanup. Keeping a designated container for the wrappers helps children stay organized and keep a tidy workspace.
- Removing the crayon paper wrappers can be a great activity for kids to practice their fine motor skills. Encourage them to participate by letting them peel off the wrappers, engaging their fingers and promoting dexterity.
- Instead of using an X-ACTO knife, you can soak the crayons in a bowl of water overnight to remove paper wrappers.
- If you have oversized crayons that don’t fit well in the molds, simply use scissors to cut them into smaller pieces. This allows for better arrangement and helps the crayons melt evenly.
- Silicone molds can be purchased from various sources such as online marketplaces like Amazon, or from craft stores like Joanne Fabrics, Michaels, and Hobby Lobby. Keep an eye out for discounts on molds, especially after the seasons and holidays. You may even stumble upon unique molds at thrift stores. Choose a mold that brings a smile to your face.
- If you happened to watch my “how to” reel on Instagram or Facebook and noticed that I cut the mold to remove the popsicle stick…Don’t do that! That was unnecessary. Instead, simply pop the popsicle out of the mold and then pull it upward to free the popsicle stick. This method ensures a clean separation without the need for cutting.
- You can speed up the cooling process by placing them in the refrigerator once the liquid becomes warm. The cool environment helps the crayons solidify more quickly, allowing you to enjoy your new creations sooner!
Fun Popsicle Crayon Extension Activities:
- Turn this activity into a science lesson by explaining how solids transform into liquids. Engage curious minds by discussing the concept of melting and the changes that occur when heat is applied. Explore the transformation process of the crayons from solid sticks to liquid wax, and back to solid form. Record the process in a Science Journal.
- Discover the joy of crayon rubbings using homemade crayons! These larger-sized crayons, with their paper wrappers removed, are perfect for creating textured rubbings. You can put together a crayon rubbing tub with items like coins, flat combs, stencils, and a Lego base plate. Crayon rubbings on leaves make a fantastic activity for the season of Fall!
- Travel back in time to one of my favorite childhood activities I called “Mystery Rainbow Paper,” also, know as Scratch Art. Start by completely covering plain white paper with an assortment of colors. Vertical or horizontal rainbow lines look amazing for an more even look. Then, take a black crayon and completely color over the multicolored surface. Use a bamboo skewer, chopstick, or a mechanical pencil without the lead and let the scratching begin. You can also use a rock from outside. This mesmerizing activity reveals stunning designs and fascinating effects through a rainbow of colors.
- You can use DIY crayons and jumbo popsicle sticks to create colorful bookmarks that you can donate to your school or local library to gift fellow book lovers.
- Challenge older children to create three-dimensional sculptures using their homemade crayons. You can slightly heat the crayons to soften them enough to mold them into different shapes and forms. Allow to cool and display the colorful art pieces.
- An idea for the older children with a knack for craftsmanship is to introduce them to the art of whittling. Let’s give a shout out to all the Boy Scouts! Using a pocket knife or X-ACTO knife (under supervision), they can carve their crayons into small sculptures. It’s essential to ensure their responsible use of sharp objects while closely monitoring their safety.
- Take advantage of the sunshine! Head outside with your popsicle crayons and enjoy coloring in the warm summer breeze, whether it’s in your backyard, at the park, or sitting in the sand at the beach. Let the beauty of nature inspire your artistic endeavors and create colorful masterpieces.
Memory Enhancer:
Make themed crayons for different holidays to give as gifts. These custom-made crayons make wonderful and fun presents to give to a preschool class for their holiday party or as delightful party favors for birthdays. You can use heart molds for Valentine’s Day, pumpkins for Halloween, or decorated trees for Christmas. Have fun making different colored variations and bring joy to those around you with these personalized, seasonal gifts.
Let’s turn recycled crayons into summertime magic! Get ready for a season filled with creativity, popsicles, and endless fun! Dive into a world of colors, make some vibrant memories, and let your artistic ideas come to life!
🍦For another yummy looking craft, check out Ice Cream Cone Art Using Apples As Your Paintbrush! Instead of using traditional paint brushes, grab an apple and let it be your canvas brush! An excellent craft for all ages!🍧